AIR CONDITIONING NEEDS SERVICE?
HERE IS WHAT TO DO!
Author: Andre Clemente, Founder of New Old Cars, LLC ©
609 EPA licensed (Mobile Vehicle Air Conditioning)
Last updated: July 24, 2020
If you’re reading this, chances are your A/C isn’t blowing cold. You probably think that low refrigerant is the cause, and that’s usually the case. However, before you go running off to the auto parts store, understand that low refrigerant is the result of a leak in your system.
Did you know that cars lose an average of 2.3 lbs of refrigerant in their lifetime? Older cars with less sophisticated systems are even worse, as they lose an average of 4lbs in their lifetime! While your car’s A/C system is intended to be completely sealed from the factory, refrigerant will leak out of the tiniest crevices over time as the car ages.
In fact, let’s look at some statistics released from the EPA:
- The service port fittings on your A/C system are responsible for over half of all system leaks.
- Because of #1, missing schrader valve caps (which have O-rings) account for up to 1lb of refrigerant loss per year, on average.
- The front compressor seal is a common problem area – an average of .5 oz of refrigerant can leak every year through this seal alone (on average).
- Cooling system issues (such as low coolant level) will effect the performance of your air conditioning system.
TAP IMAGE TO REVEAL TEXT


Leaks in the system introduce another problem: if refrigerant can sneak out, then air can sneak in. Air contains moisture, which is the no.1 contaminant in an air conditioning system. The uninvited moisture will reduce the performance and cause corrosion, freezing, blockage, and even sludge.
Some people don’t bother spending money on fixing leaks and just continue topping off their system after it gets low again. This is one of the worst things you can do. Running the A/C when low on refrigerant is bad for the system. In fact, the longer you leave the system low or empty, the more damage you can cause (the compressor can starve from lack of lubrication, etc).
There are some R134a systems capable of running with 2.5% – 3% air in the system (without issues), but for the rest, anything with over 2% air in the system can cause problems. For example, orifice tube systems are known to freeze up when as little as 2% leakage is present in the system.
Bottom line: Simply adding refrigerant to your system is not a solution because it doesn’t address the leak, and moisture will still be present. Why waste money doing it the wrong way? If you truly want your A/C functioning like it did from the factory, there are a few facts you should know – starting with the method you use to fill the system.
For perspective, the average A/C system holds about 30 oz of refrigerant and 6 oz of oil, but this varies greatly. See you Owner’s manual for specification or click here to view your factory specifications.
A/C servicing: what you don’t know about the DIY Recharge Can
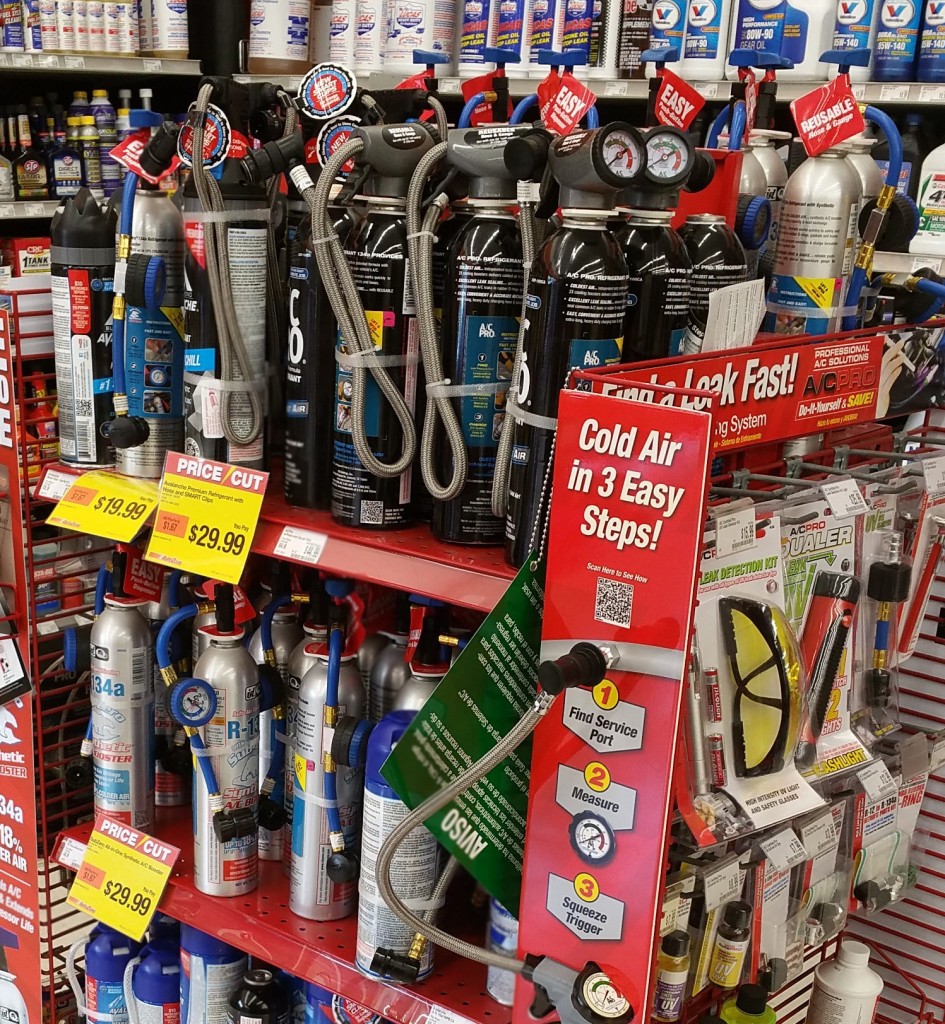
…and plenty more, as we will dive into. Despite the temporary fix, a DIY recharge can will shorten the life of your air conditioning system. Having your A/C recovered and refilled via a recovery machine is the only way to charge your air conditioning to factory performance levels.
To prove this point, here is a comparison of how both methods address the steps required to bring your A/C to its full potential. It’s a face-off between the professional method via recovery machine (can typically be done for ~$150 with leak testing) vs the DIY Can method (can range from $20 to $40, no leak testing):
Step One: Checking For Leaks
DIY Can Method: You won’t know there’s a sizeable leak until you inject your new refrigerant into the system and watch the gauge. If a leak is present, the pressure will slowly drop as refrigerant leaks out (there goes your money). This could take a while – it depends on how big the leak is!

TAP IMAGE TO REVEAL TEXT
Step Two: Fix leaks and/or Replace Parts
Professional: With the system running, the professional will be able to identify a faulty part by monitoring pressures and temperatures throughout the entire system. If one part of the system is warmer than it should be, for example, the tech can isolate the problem and replace the bad part after the refrigerant is evacuated.
DIY Can Method: Good luck. Many DIY cans contain sealant – labeled as “additives” or “cooling boosters” (??) – which claim to “stop leaks”. Not only is this sealant largely ineffective, but it is damaging for the A/C system (especially the compressor). Some contain a conditioner designed to “swell up dried rubber seals”. The manufacturer of your car never designed the A/C system to operate with foreign materials like these sealants and conditioners (which end up mixing with the contamination in the system). The only way to stop a leak is to repair it.
Note: If not from the service ports or compressor, leaks almost always occur at system connections. While tightening a fitting can sometimes fix a leak, remember that these connections have O-rings – and over tightening them will ruin them.
Step Three: Removal
Air and moisture reduces the performance of your A/C, and is the no.1 contaminant in the system. Removal is required for your system to blow its absolute coldest.
Professional: Uses the machine to recover everything from the system – all refrigerant, oil, and air – via a vacuum. Dropping pressure to below 28 in Hg will boil moisture out of the system. You now have a clean, empty system! This is the only way to remove air, moisture, and any other contaminants. The machine will show an accurate reading (in ounces) of how much has been removed from your system.
DIY Can Method: No removal is performed, as it is designed only to top off your system. Also, if your car is old, the previous owners may have already used DIY refill cans, which means your oil/refrigerant ratio is completely off. DIY cans are pre-filled with their own ratio of oil and refrigerant – not your manufacturer’s ratio! This means every use of a DIY refill product will keep adding oil to your system, completely disregarding the factory oil capacity requirement (which can damage the compressor). Refrigerant particles are small and will leak out before any oil will. Your system is usually low on refrigerant, not oil!
Step 4: Refill
Overcharging is harmful to your air conditioning system. It can overload your accumulator, allowing liquid refrigerant into the compressor (causing damage). It can also overload your receiver/dryer in a TXV system. You will know you’ve overcharged your TXV system (found on modern cars) because the A/C will blow warm, despite the low gauge showing a correct reading.
Professional: Fills your empty system with the exact amount of refrigerant (down to the tenth of an ounce) required by your manufacturer, as well as the correct type. When it comes to oil, different cars require different oils (whether it’s PAG 46, 100, etc). The professional has access to this information and can ensure that the correct oil to refrigerant ratio is added to your car.
DIY Can Method: Whatever is in the can is what you get.
One of the biggest downfalls of using a DIY can is the inability to gauge how much refrigerant is already in the system, as well as the inability to ensure the correct amount of refrigerant and oil is added into the system. It is very easy to overcharge a system with this method. If you don’t know exactly how much refrigerant is already inside, how will you know how much to add? Now, DIY cans include a low side pressure gauge (never a high side gauge) to reveal the current pressure of the system. However, if you think that’s enough to tell you what you need to know, you are wrong.
Here is why the DIY can method (with a simple low-pressure gauge) will never ensure the correct refrigerant/oil level in the system:
1. It has no idea how much air or moisture is in your system. The gauge relies on pressure alone – how can it tell the difference between refrigerant and contamination? Air and moisture will have an impact on the gauge readings, making it difficult to determine the current level of the system. It also won’t tell you how much oil is in the system, so you have no idea how much to add.
2. You cannot properly regulate refrigerant into the system. Manufacturers have specific tolerances for how much a system can be overcharged. For example, many GM systems have a charge tolerance 10% +/-. BMW’s Mini Cooper, in comparison, allows for only a .33% +/- tolerance. A typical new system charge (top off) is between 13 oz to 16 oz. How can you possibly regulate this with a 14 oz can? In addition, there will always be some refrigerant left in the can after charging (and think how much leaks out when you connect it to your service port).
3. The pressure reading within the “green” (acceptable) area has minimal correlation to how full the system is. The capacity of R134a systems can range from 18 oz to over 50 oz on the largest systems (excluding oil, which can range an average of 5-10 oz). Despite this, we use a standardized operating range to diagnose the low side of your air conditioning system (which is 25-45 psi). If we use the same pressure range standard for diagnosing all cars, each with widely different capacities, then clearly system pressure cannot be used as an accurate means of determining how much is currently in the system. Having the needle in the “green” area just means the low-pressure side is within the acceptable range, regardless of the capacity. This “acceptable range” spans a total of 20 psi – how would you know when you surpassed your manufacturer’s charge tolerance when filling the system?
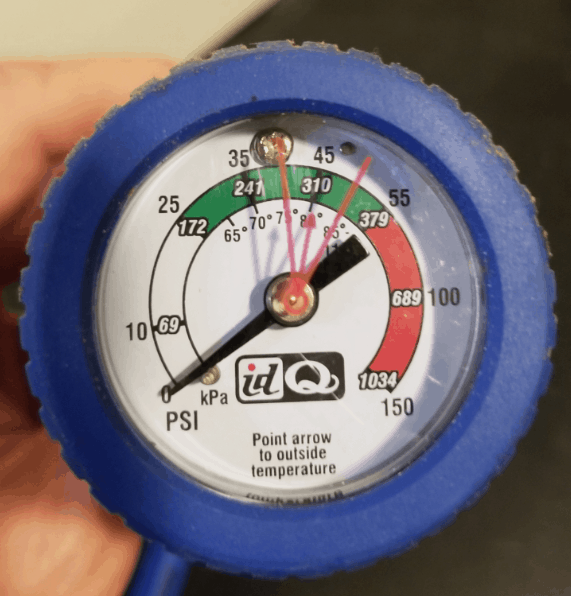
4. The reading is heavily influenced by the ambient temperature outside. We know that pressure and temperature are related. But we also know that system pressure and system refrigerant level have no direct relation. The manufacturer’s system capacity requirement doesn’t change just because it’s hot or cold outside – the exact amount still needs to be added. Different amounts of refrigerant can produce the exact same pressure reading on the gauge at different temperatures.
The gauge is to verify that the system is within an acceptable working range. It does not have a direct correlation to the amount of refrigerant in the system. It only has a vague idea when the system is “high” and when it is “low” on refrigerant.
In fact, the only thing a low-pressure gauge will reveal by itself is if the system is low or if the system isn’t functioning properly (ie, the low side reads high due to an inoperable A/C compressor or whatnot). The gauge will only vaguely reveal an overcharge in the older orifice tube systems when the needle enters the red area (btw, a system can still be overcharged when kept in the higher end of the green range). It will not reveal an overcharged TXV system, as excess refrigerant from the low side will transfer to the high side – and continue flowing. Since you have no reading of the high side, you won’t notice this happening – your low side pressure will remain constant during this phenomenon.
Step 5: Testing the system
Professional: Will now perform an established test procedure to ensure the A/C is functioning at its full potential. This involves setting your system to MAX Cold for a certain period, revving the engine to 1500+ RPM, etc. The tech can monitor the system by reading both the low AND high-pressure sides of the system.
DIY Can Method: The only method you have is turning on your A/C to check if it actually blows cold (below 40 deg), but only after saying a prayer (ironically, you’ll be sweating). Some DIY cans come with gauges that hook onto your interior vents while you’re charging and will change color once the output air through the vent reaches a predetermined temperature (remember, your A/C is on at full blast while you are charging). There are 2 problems with this:
2. Moisture and air in the system (which has not been removed) will affect the output temperature – a vent gauge cannot compensate for this, especially since it has no idea how much air/moisture is in the system.

Step 6: Satisfaction vs Cost of service
Professional: Has verified the Max Cold temp of under 40 degrees (can be as low as 37 degrees!). This all varies based on ambient temperature and humidity. Cost of service: $150 in most cases (for a straight forward leak test, recovery, and refill, including cost of refrigerant/oil). Any repairs done will obviously cost extra.
DIY Can Method: Temperature will not be as cold as the professional’s, and even if it was, it won’t stay that way for long (there’s still a leak). The life of your A/C system has now been reduced, and problems will arise sooner than later. If you couldn’t find the leak, you’ll feel it now – right as your new refrigerant and “cooling boosters” slowly leak out into the atmosphere. This will force you back to the auto parts store to buy another can sooner than later. Cost of 1 can = $19.99 to over $40. (plus your valuable time, and no leak testing). Multiple top-offs with the DIY can will be needed to maintain performance (which adds to the total cost), while a properly executed recover/refill service will allow for lengthy intervals between recharging.
Note: These prices do not apply to R12 systems. Expect to pay double or triple the cost for R12 service (for both methods).
SO WHY DO PEOPLE BOTHER WITH THE DIY RECHARGE CAN?
And why are so many sold? The answer is simple. The can is extremely convenient, cost-effective, and it results in a noticeable (and acceptable) difference in output temperature. You could argue that people who use this method are just trying to save a buck, but I don’t believe that is always the case. It is more likely that most people aren’t aware of the drawbacks of this method, and if they were, the DIY recharge kit won’t be nearly as popular.
The bottom line is this: if you want your A/C to blow like new, and if you want your system to last a long as possible, DIY recharge cans are an absolute waste of money. If you understand how air conditioning works in a car, then you will understand why an automotive air conditioning system does not require sealants, additives, or “cooling boosters” to function properly. DIY recharge cans introduce foreign material into your system – material t your system was never designed to run on. Spend the $150 or $200 to do it right. An A/C system will function its 100% best with the correct amount of refrigerant, the correct type of refrigerant, and the correct ratio of the correct oil, as the factory intended. This cannot be achieved with a DIY refill can. Period.
To Convert, Or Not To Convert? The R12 vs R134a Debate!
Tempted to convert your old car from R12 to R134a? Read why it might be a bad idea!
Author:
Andre Clemente, Founder of New Old Cars, LLC ©
609 EPA licensed (Mobile Vehicle Air Conditioning)
Article last updated: July 24, 2020
Other articles you may enjoy:
How To Confirm Original Paint On Any Car
Orange Peel: Why Your New Car’s Paint May Look So Bad
Those Paint Defects Most Likely Aren’t From The Factory
What A Paint Thickness Gauge Really Tells You
…and more, in the Tech section!
Additional Article Sources:
Gilles, Tim. Automotive Service: Inspection, Service, Repair – 4th Edition. Delmar, Cengage Learning, 2012. Print
Auto A/C expansion valves move to electronic control – SAE
Lanzer, Scott. – How Thermostatic Expansion Valves (TXV) Work – Emerson Electric Co, 2013.
The Evolution of Automotive Air Conditioning
…and many more! NOC takes incredible pride in posting only the most accurate information with the help of credible sources. Now, because some links are no longer active, not all sources are posted here. These links have been removed from the source’s website for unknown reasons. However, NOC downloads and retains all sources used to stand by every statement in this article. This is done for all articles on our website, and NOC is happy to share this information with the public. Your trust is our number one priority.